Working as a Salesforce admin, dealing with issues happening to any of your customers is part of the daily work. Some issues can be well known to you while others can be completely new and challenging. For the latter, you will need some troubleshooting.
Salesforce provides some steps and best practices for this troubleshooting process. In this post, we would like to share 8 tips which we have found to be very useful while going through each step, after having more than 6 years of experience providing Salesforce support services.
Tips by each Salesforce troubleshooting step:
Step: Identify the Issue
It is important to collect as much information as possible from the user about the issue and its context to better understand how the resolve the issue. During your questioning, you should make sure you obtain an answer for:
- Expected vs actual outcome
- Actions the user was executing when it happened and steps to replicate the issue
- Internet browser and device used
- Time of the issue and location the user was logged in from.
- Any error message displayed and the text of the message.
Tip #1
While identifying the issue and when it first occurred (or at least the first time the user noticed it), you should be aware of recent changes in your org as they may be related, such as:
- Changes in picklist values, global picklist value sets, record types, etc.
- Recently created or modified validation or automation rules, workflow rules, processes. Mainly if there are field updates involved.
- Changes to the security model:
- or data access with sharing settings
- or security controls as Password policies, session settings, network access, etc. (remember some of those policies are both at Organization and Profile level, with Profile level overriding the Org level).
Example:
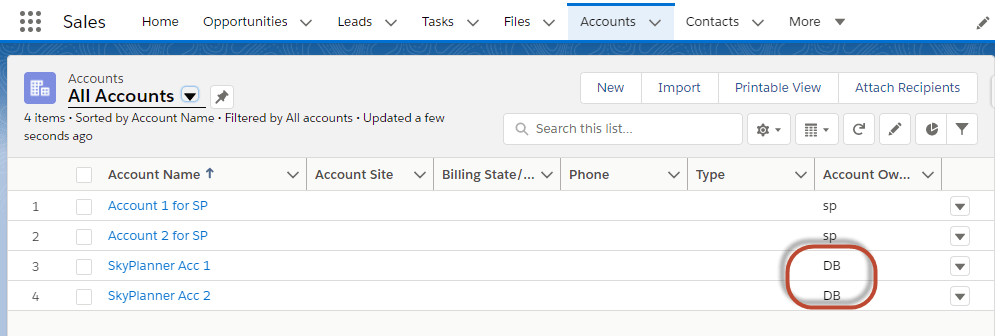
Suppose we had the user SP reporting that he had stopped seeing other user’s accounts since the previous week, but there were a few accounts that he could still see even when he was not the owner. Since we knew that the Sharing settings for the Account object had been changed to Private in the previous week, we just needed to find out why he could still see some of them.
Below are the accounts that user SP can see. This includes those accounts owned by another user which, in this case, would be under the Account Owner “DB”:
Step: Replicate the Issue
Replicating the issue can give you more information and answers. It allows you to thoroughly research, test, and discriminate if the problem happened because of a user error, if it happened just for this user or if there are more users impacted, and if it will impact the user(s) again.
Tip #2
Besides testing for different users, try to replicate and compare also using other similar and different records. This will help you to identify if the problem is specific for that record (could be data related), related to profile settings access for object/fields, or related to sharing settings access for roles/records.
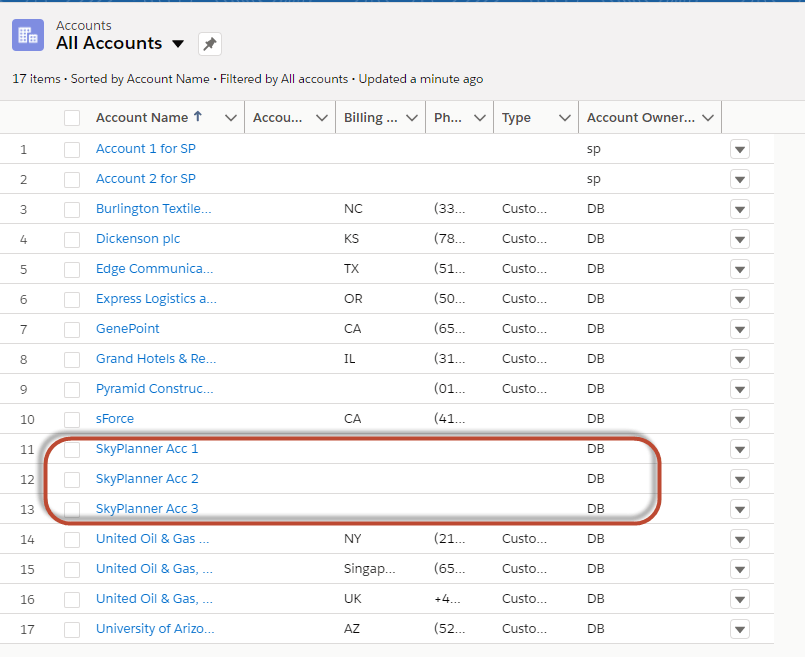
For our example, we compared those accounts owned by DB that the user could still see against other accounts also owned by DB but that the user cannot see:
- SkyPlanner Acc 1 & SkyPlanner Acc 2 -> Accounts owned by DB, user SP can see them.
- SkyPlanner Acc 3 -> Account owned by the same DB but user SP cannot see it
We compared all the 3 accounts to identify what they might have in common or what might be different. We also compared with other accounts, from the same owner or from different owners, to see if any pattern comes up from those accounts the user can see and those that the user cannot see.
Tip #3
If possible, try to replicate the problem using Classic and LEX. If the error happens to occur in just one of the two, then you will have more clues to research (mainly if there are automations involved). Even if the error happens in both user interfaces, sometimes the error message can be more detailed in one of the two. For instance, VF error messages sometimes do not appear in LEX and the page seems to be loading forever. Meanwhile in Classic, the error message can appear at the bottom of the page with useful information.
Step: Consult available resources
With all that information, you should search through existing resources to determine if the problem is already known within Salesforce, if a solution or workaround already exists, or if it is a known issue that is listed to be addressed in the future.
Useful resources:
Other sources you can consult for tracking down the reason for your issue:
- Salesforce Trust (issue may be due to a scheduled event or outage in the instance).
- Event log file: Tracks events in your org such as logins, Apex executions, API calls, etc.
Tip #4
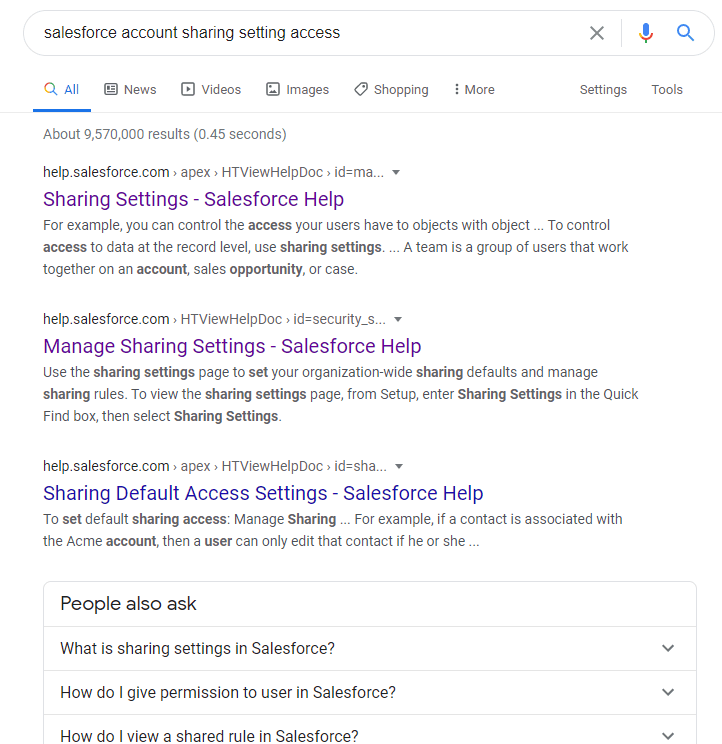
Google is your FRIEND when searching for an issue. Any existing articles or mentions in those resources will be shown in the results.
Tip #5
If troubleshooting email issues, check the Email log files from setup.
Step: Put together your possible solutions
With all the information you have gathered and researched, you should come up with several ideas of what could be done to solve your problem. You should organize your possible solutions so that the top of the list will contain the ideas you believe have the best chances of solving your issue. Therefore, you can start working and testing efficiently.
Tip #6
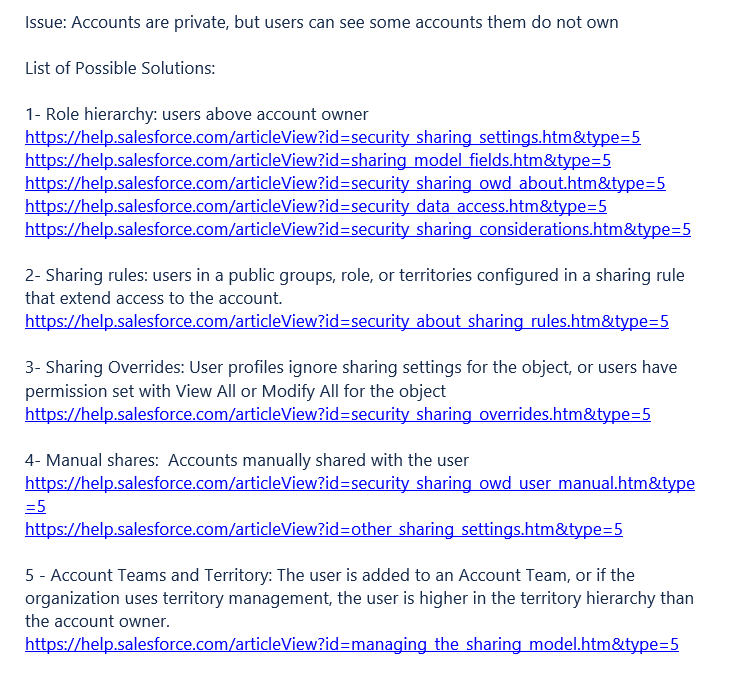
When saving your list of possible solutions, you should also save the links of the articles/resources referenced with each solution. This will save you time in case you need to consult them again later.
Step: Work and test your hypothesis
After choosing one of your possible solutions to implement and begin working/testing, it is recommended to complete this task in a Sandbox environment based on Salesforce’s best practice recommendation. Changes should be made in the Sandbox environment and not within your production organization. You should also document all steps during your testing. This will help you get a detailed reference for how the problem was solved and prevent you from repeating actions or steps when running different cycles of testing.
If the solution you chose happens to be the correct one, then you will already have it documented. Even if it was the wrong solution, the documentation can help you find a faster solution to another problem you may face in the future.
So, if the solution you chose was not the right one, move on to the following choice in the list and recommence testing/documenting everything again; then move on to the third and the fourth and so on, until you find the right one. When you have found a solution that seems to work, verify that it works not just for you but for other users as well, such as the originally impacted user. Verify that it works for the variables/scenario of the issue and try to test it in the most comprehensive way you can.
Tip #7
If you have gone through your list and you have run out of possible solutions, then you should start researching again. This time, however, try to make your search a little wider and not too specific.
For our example, our first research may include terms for:
- “Salesforce accounts sharing settings access”, which returned entries about sharing settings, sharing rules, OWD, etc. (Tip 4 image). We tested/ruled out all the possible solutions: it was not due to Role Hierarchy, the user was not included in any sharing rule, his profile or permissions did not override sharing, accounts were not manually shared with him, and he wasn’t in any team or territory.
Now we could search for:
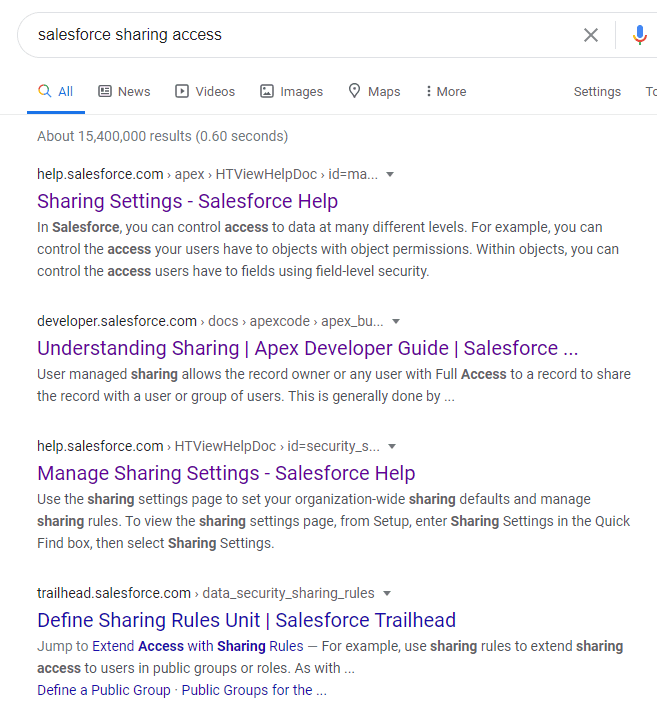
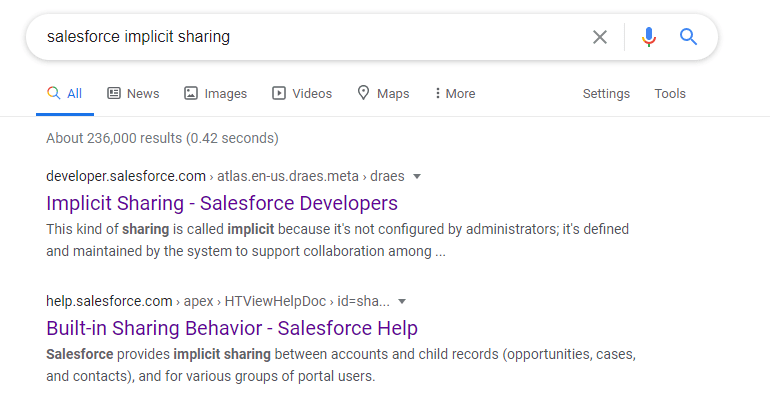
“Salesforce sharing access”, and found more comprehensive articles in the results, such as “Understanding Sharing” with new concepts about the Implicit Sharing that lead to new searches/ results for Built-In Sharing behavior, etc.
This information on the special behavior between Account and its child records (child records opening access to parent records) brought new possible solutions/explanations for our issue. Among the things in common we noticed for the accounts (Tip 2), it seemed that in all those accounts the user owned a contact. Now we just need to test that new hypothesis/solution.
Step: Communicate and execute the solution
Once you are sure you have the solution for the issue, you will have to move it to the Production environment. Even if the solution will solve the problem for one user, it may impact other users as well. Therefore, it is important to plan accordingly and communicate it to all who are involved, so that they may be aware of:
- When you plan to move the changes and how long it will take
- Actions to be done
- If there are changes or interruptions the users may experience, and which users will be impacted
After communicating the plan, allow for feedback in case any adjustments are needed. Then execute the changes in PROD, test to be sure everything works as expected, and confirm to everyone involved that it is done.
Tip #8
Images are powerful. Sometimes your solution implies:
- A visual change for the user (he/she will see something new, or something he/she used to see in one place will now be in another place or will look different…)
- An execution change for the user (he/she will have to execute an existing task or routine differently, or will have to execute a completely new routine…)
In those cases, in addition to communicating the changes before implementing them, it would be truly appreciated if you include a couple of images as a guide to users so that they know where to locate the new implementation or how to execute the routine.
In our example, the solution could be:
Option A: Transferring the ownership for the contacts to the account owner, then user SP will not see those accounts anymore:
- Contact owned by SP in account SkyPlanner Acc1 – transferred to account owner DB
- Contact owned by SP in account SkyPlanner Acc2 – transferred to account owner DB
Option B: Transferring the ownership for some contacts but not for all, as per the user’s feedback, because he needs to remain the owner for some of them. Then user SP will continue to see the account where he owns a contact:
- Contacts owned by SP in SkyPlanner Acc 1 – remain with SP owner
- Contacts owned by SP in SkyPlanner Acc 2 – transferred to the account owner DB
Therefore, after explaining and implementing option B (as per user feedback), we also created a new Account list view where the user can easily verify whether he has access to accounts not owned by him and access to the information about the actual account owner. When we confirmed that the solution is done to the user, we also shared an image of that new list view that they can start using to verify what they can access.

In conclusion, we all know that troubleshooting can be a time-consuming process, but these recommendations we shared here as tips have helped us save valuable time, identify the cause of the problem more quickly, reach a better and faster solution, and make that solution easier for the users to recognize and get familiar with. All this leads to more efficient work and more satisfied customers, and those are the main goals for Salesforce Admins!
If you want to know more tips and know-hows, just check our blog or watch our videos.


